|


GTIN
I daglig tale er der mange, som kender GTIN som en stregkode, men teknisk set er GTIN det nummer, som findes under selve stregkode-symbolet, og kan derfor også bruges til andre teknologier som fx 2D stregkoder og RFID tags.
I daglig tale er der mange, som kender GTIN som en stregkode, men teknisk set er GTIN det nummer, som findes under selve stregkode-symbolet, og kan derfor også bruges til andre teknologier som fx 2D stregkoder og RFID tags.
.png)
In this guide, we show you how to create your packaging master data in GS1Trade Packaging.
The process consists of four steps:
A product represents the physical item that will be placed on the market.
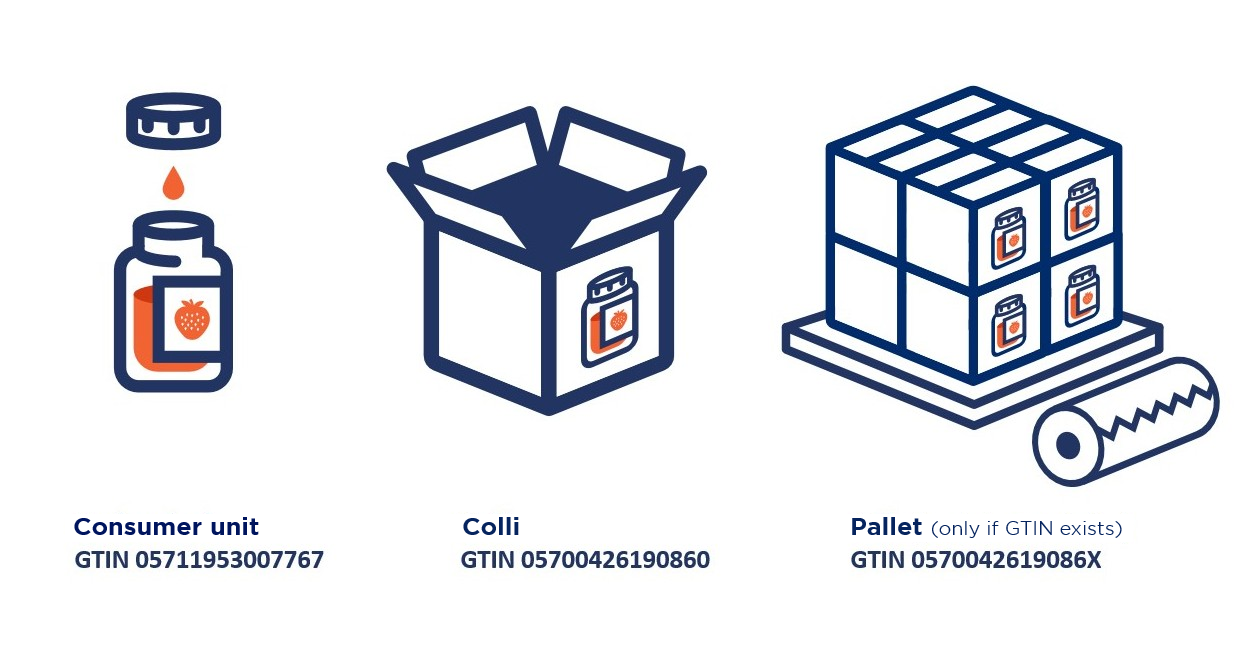
The product hierarchy typically consists of the base unit (sales item), case, and pallet.
You must create GTINs for all levels that exist in your hierarchy.
Note: In most cases, GTIN exist only for the base unit and case. If a pallet GTIN does not exist, simply create the base unit and case.
In this guide, we use a jar of jam as an example. The jam is packed in cases on a pallet. The product hierarchy therefore consists of:
How to do it:
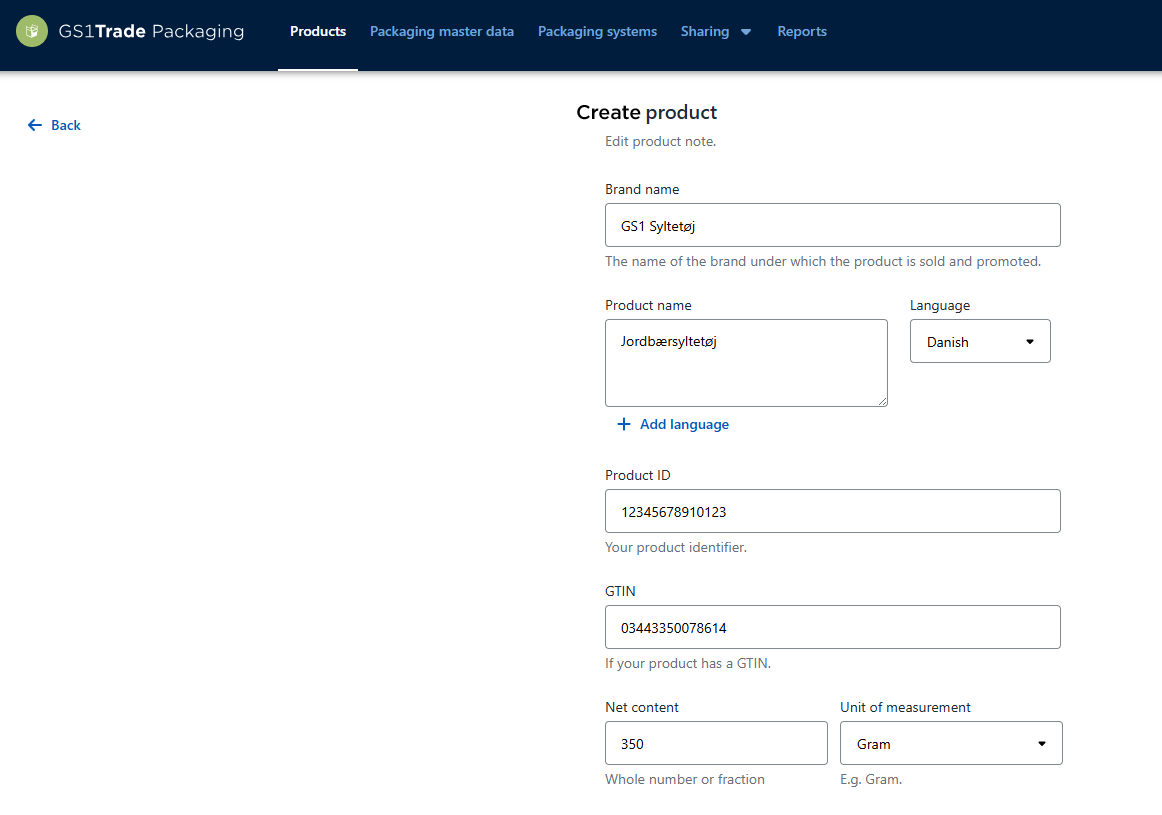
Go to the Products tab → Click Create new > Create manually.
Enter the following information:
In the following example we are creating the consumer unit.
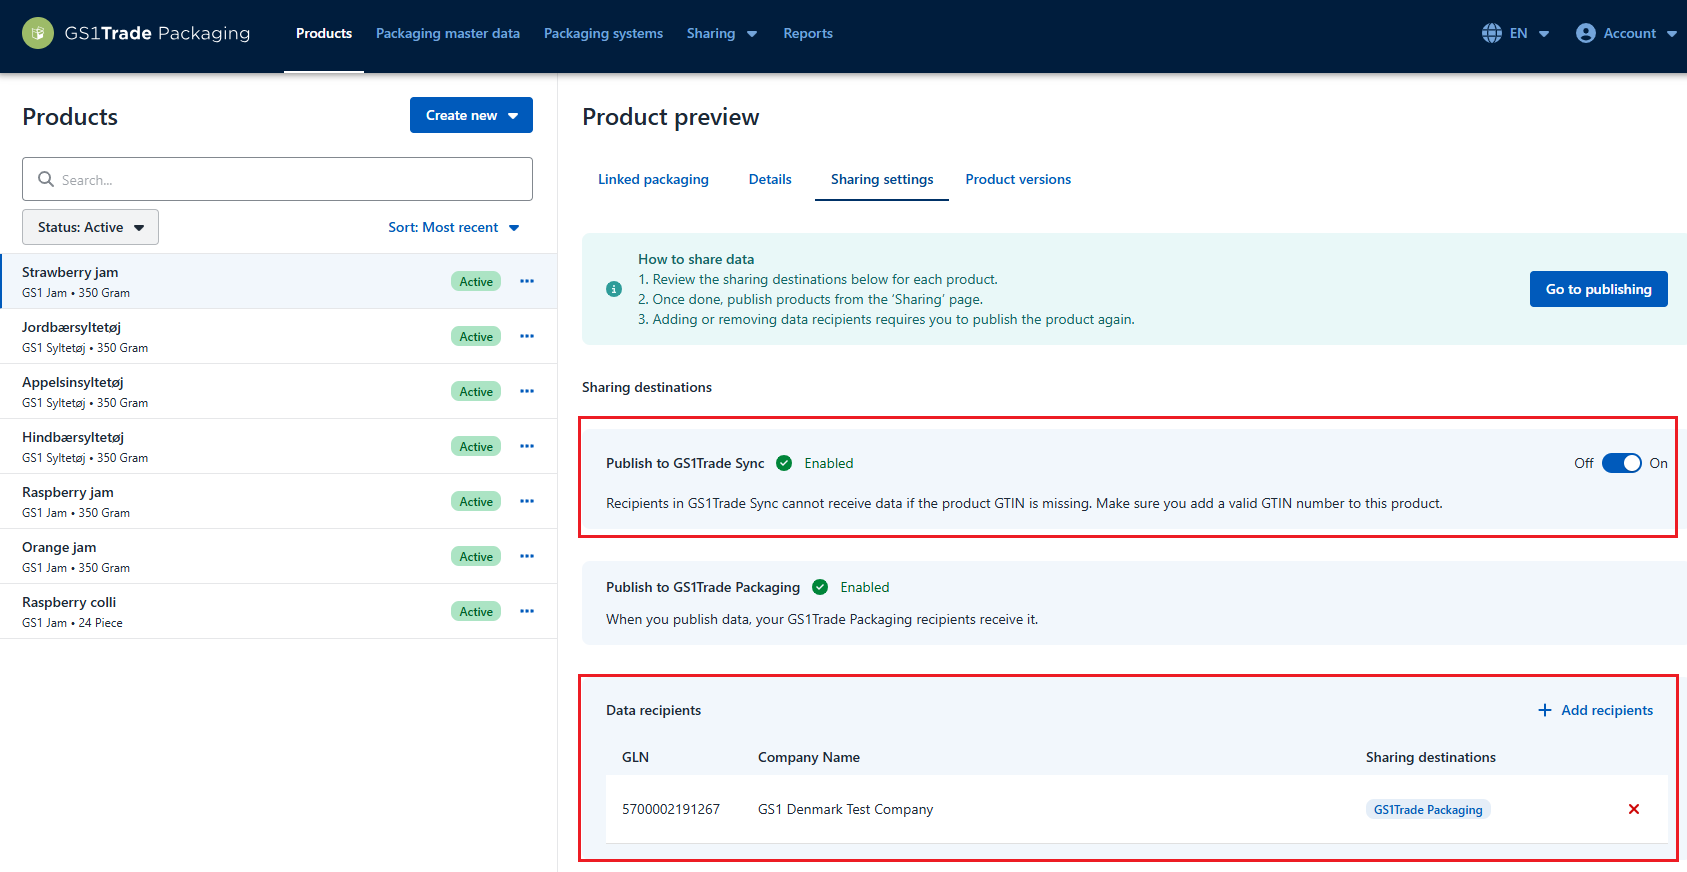
If you plan to share packaging data for this product with a customer:
Go to the Sharing settings tab on the product.
If you only use GS1Trade Packaging, you need to add the customers you wish to share packaging data with here.

If you also subscribe to GS1Trade Sync, you do not need to add data recipients in GS1Trade Packaging (unless your customers have specifically requested to receive data in both systems).
When you publish the GTINs in Trade Packaging, the packaging data will automatically be transferred to GS1Trade Sync and added to the existing product master data.
Make sure that the correct data recipients are set up for your products in GS1Trade Sync.
Note: If the products do not already exist in Trade Sync, they will be created as drafts. You must then add the data recipients and publish the product before the data is sent to your customers.
Learn more in this guide on How to Share Data in GS1Trade Packaging.
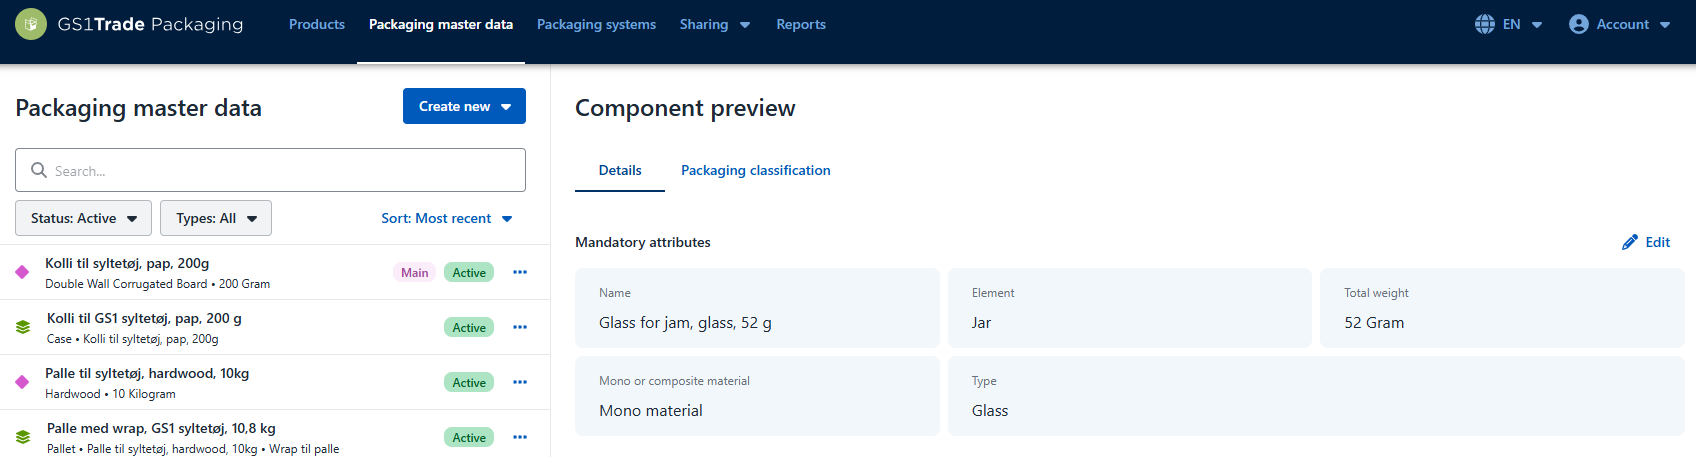
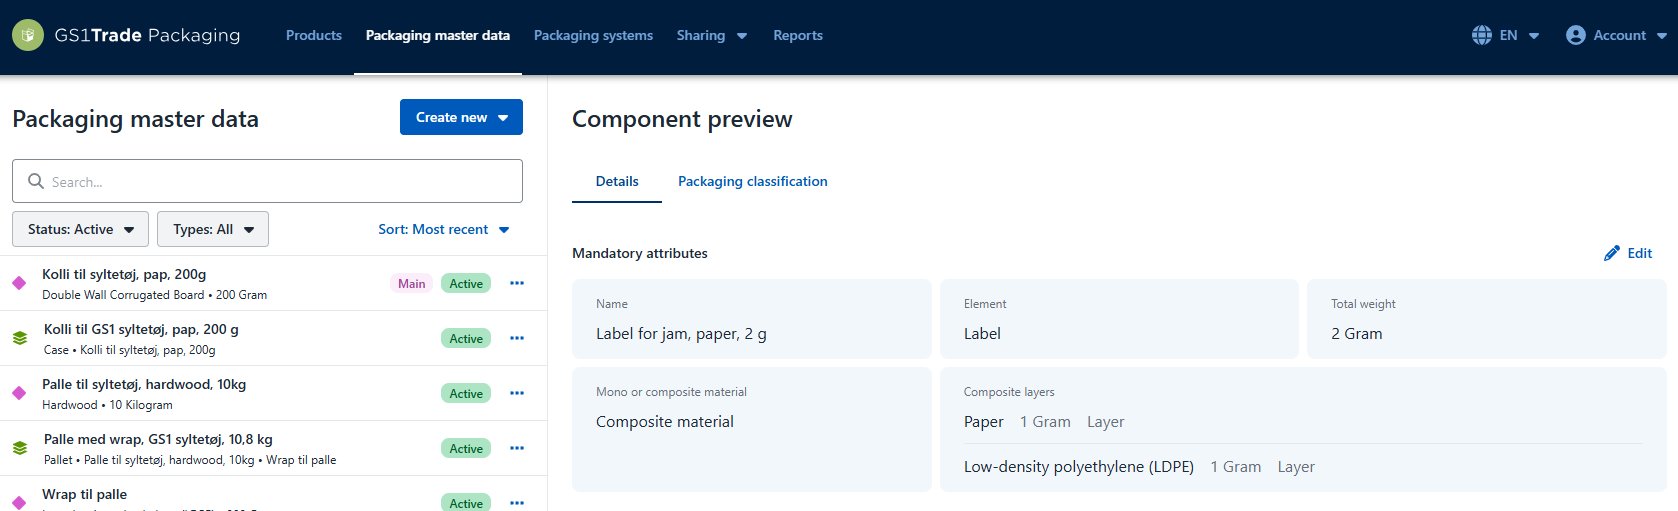
We start by creating the packaging for the base unit.
In this example, our jam product consists of three components:
The label is an integrated component on the glass.
An integrated component is defined as a packaging component that is not intended to be separated from the main component during waste sorting or transport.
Go to Packaging Master Data → Click Create new > New component.

Enter:
Click Save.

Before you assemble packaging units or perform environmental grading, it’s important to link main and integrated components.
Packaging with integrated components must be graded as one unit, according to the Danish Environmental Protection Agency’s regulation.
How to do it:


Once your components are created and integrated, you are ready to classify them according to the Danish producer responsibility regulation. All components need to be environmentally graded for correct data sharing and/or reporting.
Here you can find the full guide on how to do environmental grading in GS1Trade Packaging.
Go to the Packaging classification tab and specify:
Next, combine your components (e.g. jar and lid) into a packaging unit.
Be aware that:
Repeat steps 2.1–2.4 for the case and pallet packaging.
You now have both packaging and products created in the system and you need to link the packaging unit that is unique to each GTIN.
Base > Base packaging
Package > Package packaging
Pallet > Pallet packaging.

If you later update or improve packaging, you only need to maintain the data once, and all linked products will automatically inherit the updates.
Finally, create a packaging system for your product hierarchy. If you only need to create base units with associated primary packaging the packaging systems might not be relevant for you.

You have now created the complete packaging master data for your product.
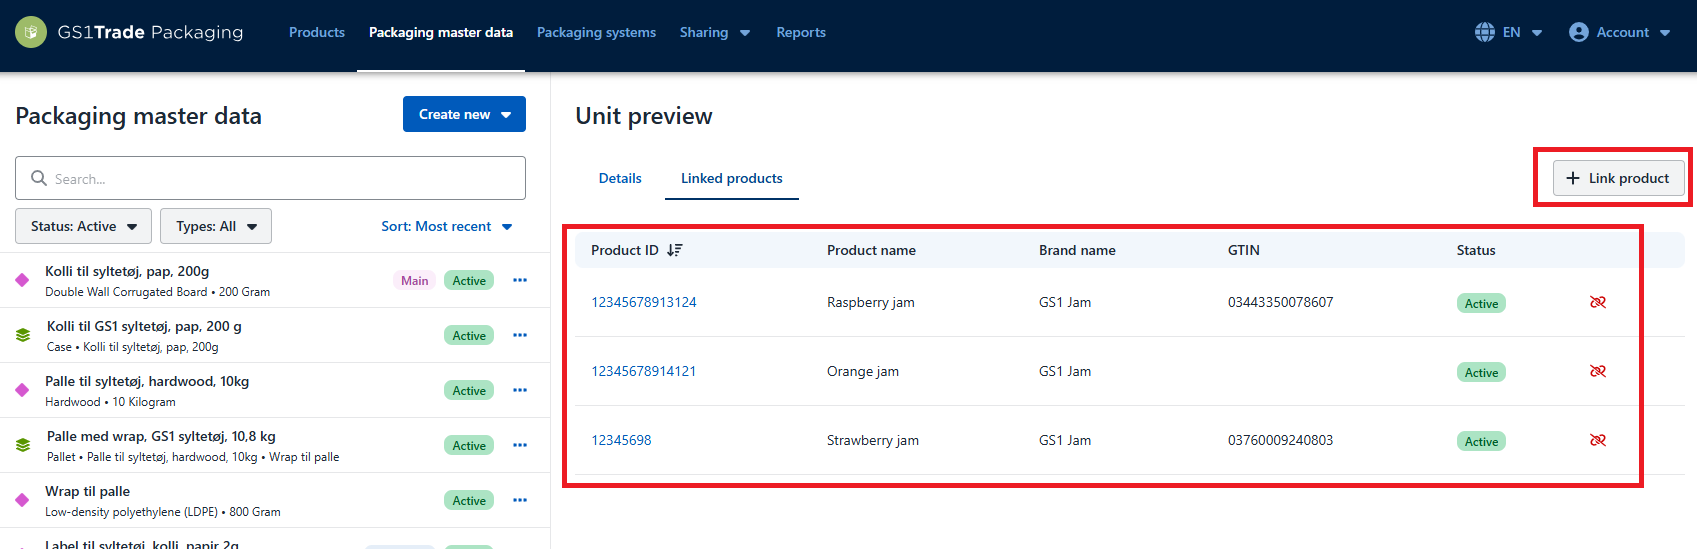
You can reuse packaging units for multiple GTINs — for example, if you have product variants that use the same packaging. You can also reuse individual packaging components across several different units.
In the example below, three jam products (strawberry, raspberry, and orange jam) have been created, but only one packaging unit. Since the same packaging is used for all three products, that unit is linked to each of them.
Packaging data that is no longer relevant or valid must be marked as Inactive. This ensures that the system only contains data that reflects current packaging use.
This applies to:
When data is marked as Inactive, it means it is no longer actively used in the packaging flow but is retained in the system for traceability and historical reference.
For this reason, it is not possible to delete products or packaging data. Instead, mark them as Inactive.
If data has been created by mistake, it should be handled in the same way.
No further updates should be made to inactive data unless it is reactivated.
We also recommend removing all associations with inactive components or units.
Har du stadig brug for hjælp? Så tag fat i GS1 Denmarks support team. Vi står altid klar til at hjælpe.